I've been around the blogs and back where it began. It's free. It's easy. It doesn't demand a whole lot from me. I can deal with that.
I also blog at: Weight for Deb

November 1st, I start a project that will likely last me over a year: every month I will knit a pair of socks using some yarn that does not contain any wool.
So far, I have 4 different colors of KnitPick's Comfy Fingering yarn. I have yarn made from milk, corn, sugar, and blends of cotton, bamboo and silk. I think at the moment I have enough yarn for 12 months -and I'm certain that more yarn will find it's way into my stash as I continue down this path.
I have 3 books to choose patterns from: Socks from the Toe Up, by Wendy Johnson; Toe-Up 2-at-a-Time Socks and 2-at-a-time-Socks, both by Melissa Morgan-Oakes.
So Monday I begin. The pattern will be Dead Simple Lace from Wendy's book using Crystal Palace's PANDA COTTON in Bison Brown. Panda Cotton is 59% bamboo,25% cotton, and 16% elastic nylon. Looking forward to getting started.
I stand at my window on a cool, damp January day, beginning the important first step of gardening: planning. At the moment, the garden beds harbor perennial plants storing up moisture and energy for the next year's growth. The lawn is bright green with a weedy annual grass that will die with the first hint of temperatures over 80 degrees. Weeds are dominating both the lawn and garden beds.
Later this winter, I will undertake a major yard renovation, removing the lawn and some of the shrubs in my very small yard and replacing them with drought-tolerant California native plantings. Paths will lead back to a spot to sit and read under the shade of our sweet gum trees, and beyond to the garden beds of vegetables and fruit trees.
Even with most of the work ahead of me, I'm planning how all this will look now, because late winter is the perfect time to carefully decide what will be growing in our gardens this year.
Even if you aren't facing major yard work, the catalogs arriving in the mail are a signal to think about this year's gardens. Without a plan, we will buy too many seeds, plant at the wrong times, and increase the chance of failure even before Mother Nature get her hands into our garden.
I see grasses blowing in my bay-influenced breeze, sturdy bushes providing shelter for the birds, and crunchy gravel paths. In the edible garden, blueberries will be added, kale will be repeated. Will there be a place for some cleome somewhere?
Julee Dunekacke is starting her southern garden already by planting onions, mustard, garlic and radishes.
Lara DeHaven, a Southeast Texas gardener, doesn't follow the local trend of planting mid-February, preferring to hold her planting until March, thus avoiding the chance of a late freeze.
Stephanie Langford talked seeds: knowing days to maturity, characteristics and features, planting both early and late varieties to spread out the harvest, and sometimes planning yield of vegetables.
Joyful Stars has decided to experiment with hay bale gardening this year. I'll admit this is a technique I always wanted to try myself. I'll keep an eye on her progress through the summer.
Seed Savers Exchange talked edible landscaping.
Eat. Drink. Better. wrote important tips for fighting cabin fever by planning the garden.
Along with hearts, groundhogs and dead presidents, February is a month to celebrate embroidery. Here are some pointers to tempt you into picking up needle and thread and making your mark on fabric.
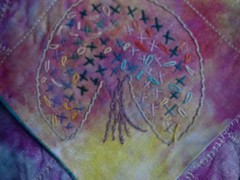
Embroidery has existed for centuries as a method of adding decoration to both clothing and household goods with needle and either thread or yarn. Occasionally beads, mirrors, or pieces of metal or bone are also used to vary the texture, reflective quality, or shape of the piece. Traditional patterns of flowers, animals, or symbols existed in different communities, almost as a way of identifying the wearers with their locale. Hi! I'm Dutch -- you can tell by the tulips on the hem of the skirt.
In its simplest form, embroidery starts when we draw or trace a simple outline pattern onto fabric, then stitch over these lines with a back stitch, which creates a solid line in thread. The most common current version of this would be popular redwork. Katie Aaberg shares some cute and simple examples of redwork that she will incorporate into a baby quilt.
NOT that back stitch embroidery has to be this plain -- though it's always this simple. Check out Jenny Hart's awesome collection of alternative embroidery designs at Sublime Stitching. From skulls to takeout food to artists' series -- oh my! I love the modern edge to her patterns paired with such a classic stitch form. Don't you?
Stepping up the difficulty scale just a bit, we move from redwork to blackwork. Blackwork again uses simple stitches -- a running stitch, a double running stitch, or, again, a back stitch -- worked evenly over threads. Because of its even-patterned nature, the important thing when doing blackwork is to carefully choose a background fabric with a even weave, such as linen. Britain's Embroiderers Guild has a charming blackwork project using a variety of threads to create foreground, background, movement, and depth.
From simple back stitch and running stitch, you can move on to buttonhole stitch, straight stitch, French knots, and the Lazy Daisy. You can consult YouTube for lots of great, simple videos that demonstrate embroidery stitches.
Once you get a handle on just a couple of these stitches, you may begin to see the whole world in patterns, repeats, knots, lines, texture. Everything can be rendered into embroidery.
My favorite form is an idea from Embroidery Guild's online project resources: Encrusted Calico. (In Britain what we Yanks call muslin, they call calico.) Encasing simple items such as beads, plastic rings, or metal washers between two layers of muslin/calico, then playing with layers of stitches on top provides a rich and wonderfully textured surface. I've used these playful pieces as small purses, pockets and pins.
The City Sage created a montage of Etsy makers who embroider.
Needles and Words declared that as part of National Embroidery Month, Saturday, 2/20/10 was another Stitch In Public day, though apparently a number of chapters of the Embroidery Guild chose to celebrate this on the first Saturday of the month.
Marie Grace thinks a the celebration is great -- it's given her an excuse to embroider for a whole month.
Sheri at cafemom shared several of her favorite links to projects.
Intrigued and want even more? Check out Sharon B's PinTangle for a great collection of patterns, stitches, and ideas for incorporating stitching into your life.
photo credit from debra roby's flickr stream.
The buzz started even before the Opening Ceremonies of the 2010 Vancouver Olympics ended. Who crocheted the hats some members of the Swedish team wore as they entered the event?

The first close-up analysis led to one question. Were these hats truly crocheted, or might they have been knit? By Saturday morning, those in the know were convinced that YES, these were crocheted hats. Why this is important: Crochet cannot be done by machine. If the Swedish team received crocheted hats, someone sat and made them all by hand.
The name of this creator -- and ideally, her story -- became as important a quest as finding a pair of the souvenir Vancouver 2010 red Olympic mittens. (I have not yet found a pattern for making these but I expect that to show up any day now, too!)
For me, the search was led by Crochet Me's Kim Werker -- who used the power of Twitter to reach out to crafters, journalists, Swedes, the world. Another one of the frenzied searchers, Elizabeth Drouillard of Things Bright, said:
Based on Internet chatter, I've found that I'm not the only crocheter to geek out over the Swedish toques. Apparently we all did. Everywhere. Through the magic that is the Internet, I think I found the maker of the hats on a Swedish daily newspaper site, because they love them as much as I do over here. Warning: Google and link madness to follow.
For a brief while, it was hoped that Catherine Andersson, shown crocheting the hat in this video, was the maker. But Swedish-speaking twitterer @bagatell reported that the video was just a news story about how easy these hats are to make.
The next step in the search was a sighting on the Swedish craft blog MiMejd. Run the blog through Google Translator and discover that Ninna and Ida found the directions in a newspaper and posted a copy of the picture on their blog. Within days of the post, their readership (normally 60 a day) jumped to the point that the new visitors crashed their blog. Last Friday, they shared their results in recreating the hat. The translating is not perfect, but they report:
The debate has raged here on the blog as to whether the "real OS-cap" is wood poles or fixed mesh, on nedtagen are made in one or both. Some who have followed the pattern has been thought that the cap has been cruelly good others have testified that it has become so ugly, that it was ready for sopnedkastet directly.
On Tuesday, Kim Werker blogged what is likely the end of the search for the creators in Super Sleuthing Success! Swedish Hats Story:
The designer of the hats, and of the entire line of Olympics clothing for the Swedish Olympics team, is Eva Christensson. The hats were crocheted in China, and she didn't indicate any more information than that.
If you'd like your own Swedish Team Hat, Crafty Peach has quickly recreated the pattern and published it for us all to use, substituting an easily available yarn. As she explains on Ravelry:
I hesitate to call myself a designer ... all I did was copy the great hat the Swedish Olympic Team wore in the Parade of Nations!
This is my version of the Swedish Olympic Team's hat from the opening ceremonies of the 2010 Winter Olympics in Vancouver, BC. I used Red Heart Super Saver in the colors Light Periwinkle, Bright Yellow, Black, and White.
The original yarn -- DROPS Eskimo -- is a Norwegian-made thick wool yarn, which crochets these hats up quickly. However, some are reporting that the weight of the yarn is complicating the construction, leading Bagatell to declare her hat more appropriately used as a cowl.
The original team hats were made by Chinese company Li Ning Sport Goods Ltd, which is the clothing sponsor for the Swedish Olympic team. Eva indicated the sponsorship relationship when I asked why the hats were made in China rather than by Swedish crocheters.
So there we have it. A worldwide crochet fad is well underway, thanks to a friendly sportswear designer who knows how cool crochet is, a hat that isn't available in stores, and a community of enthusiastic crocheters who won't stop till they have a hat of their own.
![Reblog this post [with Zemanta]](http://img.zemanta.com/reblog_e.png?x-id=7a590ed7-87cf-4bb9-b125-43427fbe90e0)


In the next few months many of us will decide we have to "buckle down" and create all the presents and decorations that are on our imaginary -or sometimes not-so-imaginary- To Do List. We have deadlines- Halloween, Thanksgiving, Hanukkah, Christmas, New Year's Day. And we cannot disappoint others by failing to create all the wonderful things that are swirling around our heads.
We settle down for several hours of work after a day of work. Soon, our hands are aching, our necks are creaking, and our lower backs are aching. But still we soldier on. In the name of all the magical goodness that is the holiday season, we will continue if it kills us.
Sometimes we end up in such pain that we wish it would.
To counteract all the physical demands we put on our bodies while we're crafting, we must warm up and stretch before we begin, and continue to stop, rest, and stretch while we are crafting. To give you some guidance about doing this, I made a simple video: Stretches for Crafters.
The stretches are simple stretches for the neck, shoulders, chest, wrists and hands. These, done before you begin and at regular intervals while you are crafting should help to keep some of the pain at bay. If repetitive stress injuries arise anyway? Alternate applications of heat and ice, NSAIDs, and rest will move you along your way to quicker healing.
Others in craft are also thinking about your health while crafting.
Becky Striepe at Crafting a Green World wrote Yoga for Crafters: The Knit and Crochet Edition.
From what you guys had to say on Twitter, it sounds like all that yarn work hits ravelers hardest in the wrists, fingers, neck and chest. Never fear! Here are some poses to help you recoop a little bit.
I'm anxious to try several of these poses to open up my chest and wrists and feel some healing coming my way. But looking at the Bow Pose- I may need yoga to recover from doing some yoga! I wonder how I can regress that to something actually do-able?
Last week, I pointed you to the Knit-A-Square charity project. The organizers were care so much about their volunteers that they wrote a How-To on Knitting for Charity Pain Free. Their points include a plan for a basic knitting/crochet training schedule to build your body's endurance for this work! The training schedule:
You are attempting to be a marathon knitter and crocheter. And as such, like any elite athlete, you need to train to be able to knit and crochet with endurance. Too many of you, especially those of you learning how to knit or crochet, or picking up your knitting needles or crochet hook again after years away from the craft, just launch straight hours of work.Start slowly and build up. As a rule of thumb, you could start by working for 20 to 30 minutes a day, slowly on a sliding scale according to half your age. So for example:
- 20 minutes for 10 days
- 30 minutes for 15 days
- 50 minutes for 25 days
- 70 minutes for 35 days.
This will give your wrists and arms the opportunity to build strength and endurance just as a marathon runner must train over months even years to first run the distance and secondly run fast.
Now that we are armed with stretches, yoga and a training schedule, there is (hopefully) no need to pray that you receive a week of massage/chiropractic after the holidays end this year. Not that such a gift would be a bad thing if it were to come.
How do you prepare to get your craft on and keep yourself pain free?
Swap-O-Rama-Rama is a clothing swap and series of do-it-yourself workshops in which a community explores creative reuse through the recycling of used clothing.
This past August, BlogHer Burnadette Noll took place in a Back to School Clothes Swap based on the Swap-o-rama-rama idea:The SwapWhen you attend the swap bring at least one bag of your unwanted clothing and a small donation (each swap varies depending on available funding). Every swap begins with a giant collective pile of clothing, the unwanted clothing of all who attend. Everyone is welcome to dive in and find their next new/used items from the pile. Take as little or as much clothing from this pile as you like, it's all free.
DIY WorkshopsAfter you have chosen your new clothes slide on over to one of the sewing stations and attend a workshop. Learn to make modifications or totally transform your finds. Each swap features a variety of workshops by local artists who are there to share their sewing and modification secrets with you. All the materials you need to sew, embroider, bead, fix, repair, knit etc, are suppled.
On Site DIY StationsSwap-O-Rama-Rama also offers on site DIY with skilled artists to help you get started. You'll find designers with sewing machines ready to teach you how to make modifications to your new/used duds. Or you might try the hand sew area and decoration station where you can learn to embroider, knit, crochet, etc. A silk screen station offers many amazing designs for immediate transfer as well as an opportunity to make your own screens using a YUDU silk screen machine.
We based it on the Swap a rama rama we had participated in at Maker Faire: seamstresses, silk screeners, swappers and more all gathered together in the school gym to help people modify the random selections they had made from the piles. It was amazing fun and an incredible display of abundance with more than enough of everything for everybody and not a single, solitary penny was spent. All the kids were psyched at getting "new" duds for back to school. All the parents were ecstatic at both getting rid of what they didn't want and gaining what they both wanted and needed while at the same time satisfying the societal urge to gussy up for back to school. And some cool fashion statements were made as various items were silk screened and altered and radified to suit the wearer.Meanwhile, Kristen at ThimblyThings received a wonderful journal page with notes on a dress for her friend Erin. From the notes we can determine several things: this is to be a flirty dress with a fitted bodice and a swingy short skirt with lots of volume. And Erin does not like bows on the front of her dresses. Kristen has
made the bodice, trimmed it with a tulle ruffle, lined it, and put in boning. The boning is not particularly comfortable. I rounded the ends, but I guess I didn’t round them enough. And they are stuck in there (They’re melted slightly to the fabric. Oops.). Any suggestions? :DThis is where Kristen could use a visit by the charming Tim Gunn -with some guidance, perhaps, on how to deal with the boning and an encouraging Make It Work! Does anyone wish to stand in for Tim with encouragement or help? Weight for Deb and BlogHer on Wednesdays and Saturdays.
But perhaps you are moving on from one crafting adventure to another, or simply cleaning house and willing to give some of your stash to others to use in charitable crafting. Crafting a Green World wrote a great list of suggestions on places to donate craft supplies for charity. Check it out.Project Linus is comprised of hundreds of local chapters and thousands of volunteers across the United States. Each volunteer and local chapter all work together to help us achieve our mission statement, which states:
First, it is our mission to provide love, a sense of security, warmth and comfort to children who are seriously ill, traumatized, or otherwise in need through the gifts of new, handmade blankets and afghans, lovingly created by volunteer “blanketeers.”
Second, it is our mission to provide a rewarding and fun service opportunity for interested individuals and groups in local communities, for the benefit of children.
Together we have distributed over three million blankets to children in need since our inception in 1995.
![Reblog this post [with Zemanta]](http://img.zemanta.com/reblog_e.png?x-id=fa8472e2-2c5a-4fce-a5e2-de1964a3b312)
There came that point where I was sewing along, perfectly proud that I was constructing without a pattern to guide me, and I stopped to flip the skirt right side out. One side was wonky. I had somehow pleated the length that should not have had any gathers. For a moment I was ready to quit, and I actually turned my machine off, unplugged it, and threw the "skirt" aside. I pouted for a minute, but I just couldn't bear the thought of that fabric going to waste, and I picked it up to look again. The solution was simple. It did involve a bit of seam ripping (which I just do not like at all,) but it didn't take long, and I revved the machine back up and finished.The final project is so cute, that I'm sure she's glad she took the time to make it just what she wanted.
Is it a wrap? A skirt? A cowl? This pattern can be worn several different ways-which makes it not only gorgeous, but one of those very versatile pieces. Uma Joy knit Myriad and shares the pattern with us. How many ways can you imagine wearing it?Anyway, it’s for these reasons that I never buy new leather. I usually get it second hand. Politics aside, it is a superior material in a lot of ways and I figure it’s better not to waste it once its already been created. (Yes – people do see me wearing it and no - they don’t know that it’s recycled and, yes, this theoretically does encourage other people in their consumption of meat/leather products. No comment. Don’t really know what to do about it.)
My one request: Please, if you’re going to use this pattern, DON’T use brand new leather that you bought anonymously from the store. Find it, recycle it, hunt it and tan it yourself -whatever. Just be connected to and ok with where it came from. Or, heck, use the fake stuff. =)
If you're anything like me, your jewelry box consists of single earrings, broken necklaces, and beads from bracelets past. With a new season in full swing, it’s time to resurrect those stray pieces into a sexy necklace that'll cost you a just a couple of dollars and about 20 minutes to make.
If you are taking your photo in poor lighting, you are setting yourself for a bad photo from the get go. Go next to a window with light streaming in or set up the photo next to a lamp (or two). Even though it's not "professional" studio lighting, it creates a much warmer glow. Now, here's the kicker...DON'T USE THE FLASH. People are soooooo addicted to flash and in certain circumstances it is neccessary, but if you have sufficient lighting, then most times you can get a good photo just from the light you are using and it's much crisper and more vibrant an image.Hat Tip to Crafty Pod's Diane Gilliland for pointing some of these finds out to me.
With the anniversary of Woodstock, and more people going green and natural, I've noticed that hemp jewelry is being worn more. In the college town where I live, I see it on many of the students.What struck me about the pretty bracelets she'd made was NOT that they were made from hemp -very pretty, BTW- but that they were made by macrame. According to Wikipedia,
Macramé or macramé is a form of textile-making using knotting rather than weaving or knitting. Its primary knots are the square knot and forms of hitching (full hitch and double half hitches). It has been used by sailors, especially in elaborate or ornamental knotting forms to decorate anything from knife handles to bottles to parts of shipsThank goodness this definition says nothing about the thick nylon and acrylic cords tied into owls and plant hangers in the 60s and 70s. Anyone who lived through that is probably running in panic from the word. The definition places macrame in it's wider context. With knots, one can manipulate tension and shape in strands of fiber. This change in tension lets knotted textiles undulate and flow in ways that are difficult to achieve through weaving or looping (knitting or crochet).
Well, I had ignore the bee for most of the week because I had zero time to devote to macramé owls. But then Friday night I was able search around and try to find a macramé owl pattern. I'd decided to make one with embroidery floss as an homage to friendship bracelets. I was a little surprised (and a lot crestfallen) to find out that making a mini macramé owl wasn't an original idea (this one is cute and these are amazing). But after a couple moments of "aw shucks," my initial enthusiasm came back.Note her word: mini macrame as that seems to be the way that macrame is manifesting itself this time around. Rather than the super-thick huge decorations I recall from the past, knotting is now being done with hemp, cotton crochet thread, embroidery floss. Thin, small, delicate fibers that make for charming delicate accessories. Craft offered a pattern for an IPod Cozy, there are several online tutorials for making friendship bracelets similar to ebogie's. Micro macrame jewelry-adding the curving, softening nature of knots to beads and other harder jeweled items- appears to be a growing accessory field.
I had been thinking awhile about trying my hand in micro macrame'. I might even do some designing on my own eventually once I start to feel more comfortable in doing this work and maybe marrying it to tatting. We will see what will happen with that as time goes buy (sic)...Autumn Wiggins, at Crafting A Green World, points out why it's important to overlook macrame's unfortunate presence several decades ago, and why we should Tune In, Turn On, and Tie Knots:
Yes, I know what you’re thinking…plant hangers and googly eyed owls…haha. Make fun all you want, but you’ll be overlooking one of the most sustainable, inexpensive, and meditative craft techniques out there.I have a feeling that knots are building as a force in Craft. I noticed that last week two designers on Project Runway used the word "macrame" in describing parts of their design. Will you be jumping on this wave?
...Imagine cutting, then arranging thirty two 12ft lengths of hemp cord in front of you. As you begin to follow the pattern of knots, it becomes familiar and rhythmic. Much like a knitting groove, only more exotic. Your arms gracefully fling from side to side as they pull the knots through, while your fingers flutter about the strings. It’s like ballet dancing and playing the cello all at once from the waist up. I prefer to sit Indian style, and on the ground if possible. In the right setting this craft can be an introspective alternative to fidgety meditation. (Hey, yoga is not an option for people who drink as much coffee as me.)
There were no fiber artists this year – there never are (which is, perhaps, a niche I could take advantage of), but there was an incense maker whom we talked with for a while. It’s always very pleasant to meet other paganfolk. And a broom and candle seller we know from the flea market was there – they had their little doggy as well, and Tommy and the yorkie got to play while we visited. We came away with happily renewed acquaintances and some candles and incense that smell lovely!
As a young adult, even without summer vacation (and with the
frustration of being stuck behind a desk at a boring day job when I
longed to be out in the sun) I still liked summer best. The weather
alone was reason enough for someone as outdoorsy as I (yes, even in the
city.) There was a carnival atmosphere that I loved, especially with
the proliferation of street fairs (some New Yorkers hate those but I
can't get enough of them.)
Not all flowers are suitable for pounding. Flowers with particularly thick petals such as tulips don’t work well as they tend to smear. Flowers with many petals such as roses need to be take apart so that you can pound the petals individually. Daisy like blooms need to have their centers removed and all flowers need to have stems, calyxes, pistils and stamens removed. White flowers don’t work as they have no pigment to impart to the fabric.Wendy from Build/Make/Craft/Bake demonstrated how to make beautiful botical prints in Hammered Flowers and Leaf Prints. These prints on watercolor paper would make wonderful cards or gift tags.
Flowers that work particularly well for this include phlox florets, single roses or rose petals, single impatiens, pansies with as much of the back removed as possible without destroying the flower (this takes some practice), hardy geraniums, St. Johns Wort, Forget-me-nots, any flower that can be flattened without losing the integrity of the bloom. The best time to pick the flowers is after the dew has dried, but before the heat of the day. New blooms have more color than older. You can also use leaves, and newer leaves pound much better than older, although as they age, you get the veins and edges and that can be interesting. Autumn leaves will pound out interestingly, the colors being old, but newly released form the covering of chlorophyll.
Leaf Prints: If you're not up to pounding the pigment from leaves, you might appreciate CraftStylish's directions for printing napkins with your leaves.Start by going on a walk or visiting your garden to find leaves and flowers to work with. You're looking for things with bright colors that aren't too juicy or too dry. It'll take a little trial and error to find good plants, so start with a variety and play around.Then set up your work surface. You want a smooth, hard surface that you can hammer on and not worry about denting or getting messy. I used a plastic cutting board covered with a paper bag.
I'm not gonna lie. This project will take a bit of planning and time, but I was really pleased with the results. I'm so looking forward to giving these handmade sachets as gifts. They are simple but personal. I think when times are hard, a small thoughtful gesture that involves time and effort means much more than an extravagant something ordered online in five minutes.If you are not sure how to dry your own lavender, Peggy Murray explains it well. You can pick and start drying your lavender now, sewing some sachets while it drying and be well on your way to some charming hostess gifts or small holiday presents this winter.
And besides, embroidery is quite theraputic. At about sachet number three, I found the rhythm of the needle piercing the fabric and drawing through reminded me of breathing. It became quite meditative.
I started making garden art/junk when I had a newly planted, barren-looking garden and wanted to fill in some spaces while waiting 2-3 seasons for the plants to grow. I love the idea of taking items that would otherwise be tossed in the landfill and turn them into something beautiful and/or interesting and/or functional in the garden (hopefully scoring at least two out of three on these points!).Recycle Broken Ceramics as Garden Decor. Cooie Grey-Lavin made a great video highlighting how we could take chipped dishes, cracked pots, and damaged lids, partially bury them in the soil and use them to decorate a garden space.





